Fluorescence Applications
Fluorescence is a highly sensitive method for detecting DNA, RNA or proteins. You can either bind fluorescent molecules directly to nucleic acids or proteins or with proteins; you can attach a fluorophore to a secondary or tertiary antibody that binds to your target protein. To visualise fluorescent molecules, you need to excite them with a high-intensity light source such as UV, RGB or IR light. When excited, a fluorophore generates light emission as many thousands of detectable photons that you can capture with a CCD camera. Since fluorescent molecules produce so many photons of light, with the right types of image capture technology, you can detect as little as picogram and femtogram levels of nucleic acids and proteins. Additionally, as each type of fluorophore produces light in different colours, you can use several fluorescent molecules simultaneously to detect many separate target proteins on one gel.
DNA/RNA/Protein Gels
Ethidium bromide has long been used to visualise DNA and RNA in gels, but safer alternatives such as SYBR® Safe, SYBR® Gold, GelRed™, GelGreen™, and SYBR® Green provide strong fluorescence with blue light excitation. Protein gels can also be imaged, with quantitative data obtained using protein standards.
NuGenius, InGenius, G:BOX, and G:BOX mini systems enable rapid imaging of fluorescent DNA, RNA, and protein samples. A blue converter screen is required for safe DNA dyes, while a visible converter screen is used for protein gels stained with Coomassie Blue or silver stains. For band excision, the transilluminator slides out for easy access.
Stain-Free™ gels offer a faster alternative to staining and de-staining, generating fluorescence by binding to tryptophan residues in proteins. The NuGenius+, G:BOX, and G:BOX mini systems are optimised for Stain-Free™ imaging, with integrated UV transillumination and software that automatically selects the best conditions for consistent, high-quality results.
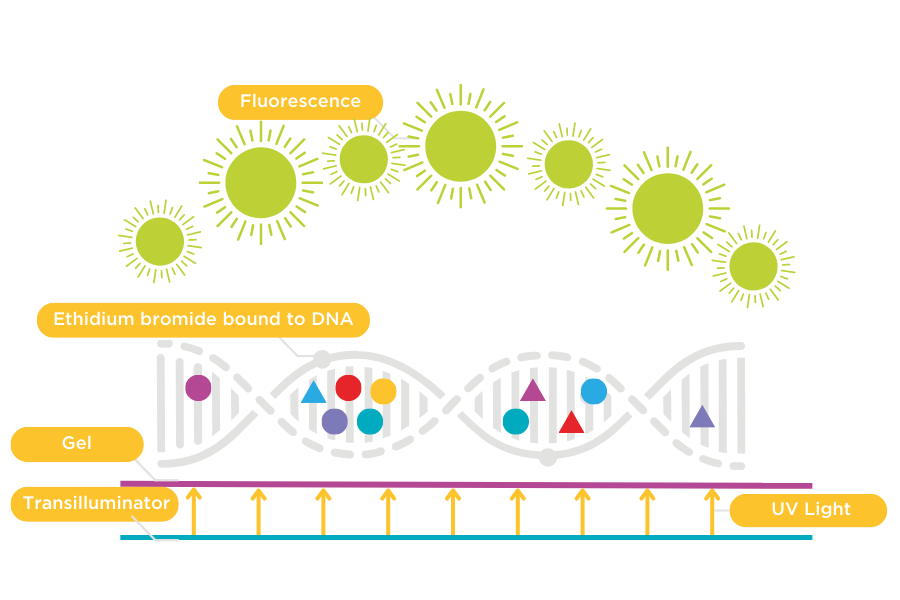
Figure 1: Ethidium Bromide bound to DNA.
Ethidium bromide intercalates between the bases of DNA and elongates the DNA helix. To visualise Ethidium bromide, a UV excitation source is required.
Western Blots
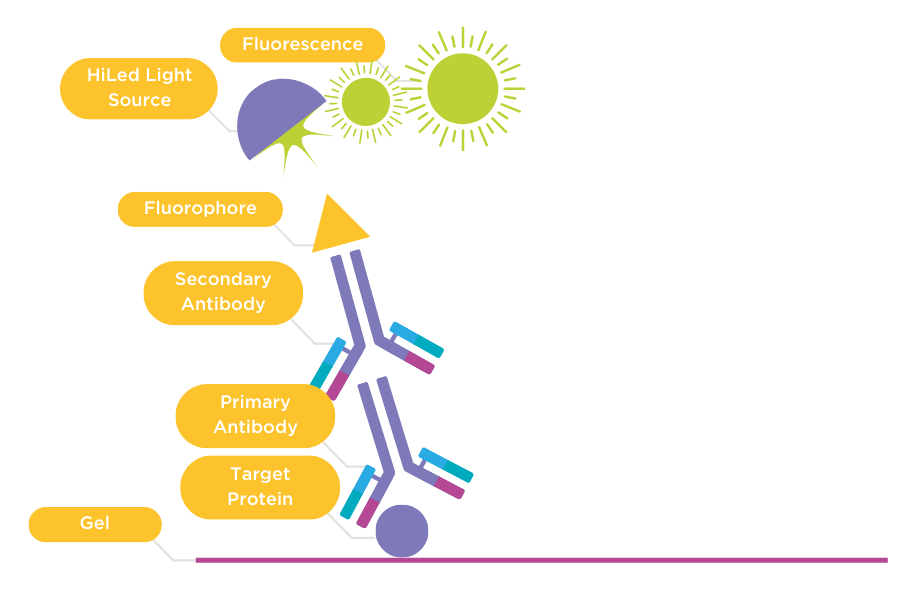
Figure 2: Direct detection of primary and secondary antibodies.
Primary antibody (1) binds to the target protein on the membrane. The membrane is then incubated with a secondary antibody (2) that is conjugated with a fluorophore. The membrane is imaged using a HiLED light source that excites the fluorophore and generates fluorescence captured by a CCD camera.
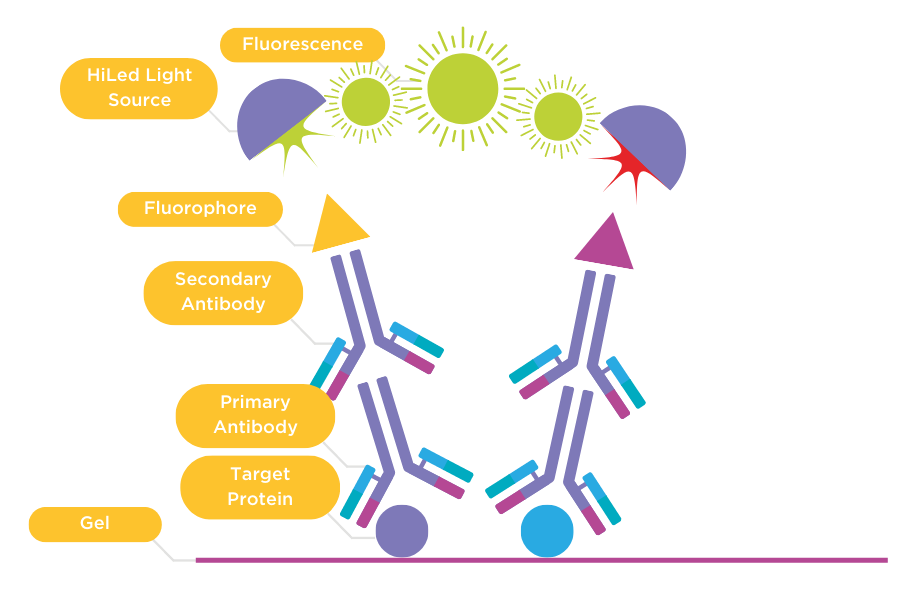
Multiplex Protein Gels
Fluorescence multiplexing is designed to visualise multiple proteins of interest simultaneously—typically two or three—in a single experiment, eliminating the need for stripping and reprobing. Different secondary antibodies, labelled with distinct fluorescent dyes, can be used for detection either in-gel or on a blot. This approach enables multiplex protein analysis, allowing researchers to study several targets within the same experiment efficiently and accurately.
You can rapidly image multiplex fluorescence proteins on western blots or in gels with the G:BOX or G:BOX mini systems using specific filters and HI-LED RGB and IR lighting options. The systems’ GeneSys software automatically selects the best combination of lighting and filters available to image each dye. You can then capture one or multiple images of your blot or gel and overlay different colour images. This means you can produce one complete picture of all your different fluorescent proteins without having to strip and re-probe a blot, making visualising and analysing each protein accurately simple.